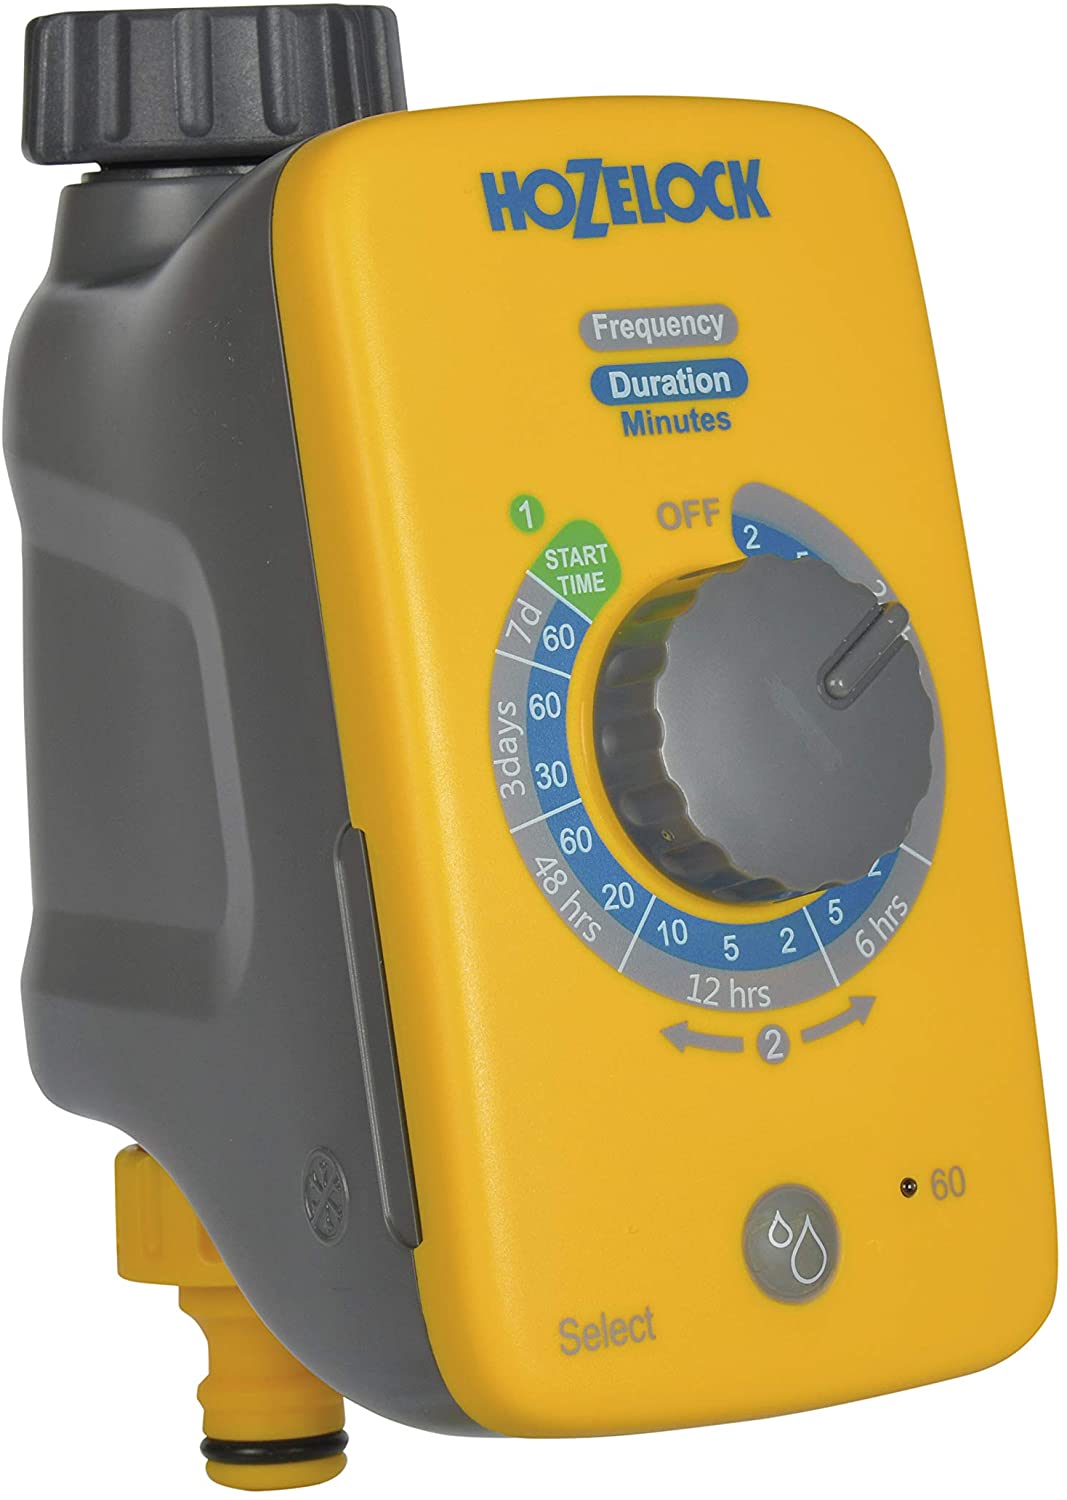
Hozelock Select Water Timer Controller – Standard
£32.99
Last updated on February 26, 2025 2:23 am Details
Report Abuse

Description
How to Use the Hozelock Select Controller Water Timer Standard
Step 1: Unbox the Product
- Carefully open the packaging.
- Remove the water timer and any included accessories.
Step 2: Battery Installation
- Locate the battery compartment on the device.
- Insert the appropriate batteries as indicated by the polarity markings.
- Close the battery compartment securely.
Step 3: Connect to the Tap
- Ensure the tap is turned off.
- Attach the timer to the tap by screwing it onto the tap connector.
- Ensure it is tightly secured to prevent leaks.
Step 4: Set the Watering Schedule
- Use the dial or buttons on the timer to set the desired watering frequency and duration.
- Consult the included manual for specific programming instructions.
Step 5: Test the Timer
- Turn on the tap to allow water flow to the timer.
- Manually trigger a watering session to ensure the timer is functioning correctly.
Step 6: Regular Maintenance
- Check the battery status periodically and replace batteries when needed.
- Inspect for leaks or wear and tear regularly.
Enjoy efficient and automated garden watering with your Hozelock Select Controller Water Timer!
3 reviews for Hozelock Select Water Timer Controller – Standard
Loading...
Vendor Information
- Store Name: Good Office Supplies
- Vendor: Good Office Supplies
- No ratings found yet!
Product Location
32 The Broadway, Ealing, Greenford, UB6 9PT, United Kingdom-

ORACSTAR 3/4 Inch Polyethylene Washers, Pack of 5
£1.16 Add to basket -

ACROPAL ZELIE 16CM BOWL
£0.98 Add to basket -
27CM APOLLO WOOD SALT GRINDER
£4.46 Add to basket -

AMTECH Carbon Steel Brick Jointer 13mm x 16mm
£1.09 Add to basket -

MIRACLE GRO UNIVERSAL SOLUBLE PLANT FOOD 1KG + 20% BONUS
£5.82 Add to basket -

MASTERCOOK 3L Plastic Hotpot/Casserole (3000ML)
£7.03 Add to basket


Maira (verified owner) –
I will definitely be ordering again. The products were exactly what I was looking for, and delivery was very fast.
Paige (verified owner) –
Every purchase from this wholesaler has been a pleasant experience. The products are always exactly what I need, and the prices are very reasonable.
Kareem (verified owner) –
I’m so impressed with the product quality. The wholesaler always provides excellent service, and my orders arrive on time every time.