

Description
How to Use the Friends Wooden Photo Frame
Step 1: Unpack the Frame
- Carefully remove the photo frame from its packaging.
- Inspect the frame for any visible damage.
Step 2: Prepare Your Photos
- Select up to 10 photos you would like to display.
- Ensure each photo fits the designated space in the frame.
- Trim the photos if necessary for a perfect fit.
Step 3: Insert Photos into the Frame
- Turn the frame to its back side.
- Carefully open the fasteners or latches holding the backing in place.
- Remove the backing to expose the photo slots.
- Insert each photo into the appropriate slot.
- Reattach the backing, ensuring all fasteners or latches are securely closed.
Step 4: Choose a Location for Display
- Select a suitable wall location for hanging the frame.
- Consider lighting and visibility for optimal display.
Step 5: Hang the Frame
- Use a nail or wall hook that can support the frame’s weight.
- Align the frame’s hanging hardware with the nail or hook on the wall.
- Gently hang the frame and adjust to ensure it is level.
Step 6: Maintain Your Frame
- Regularly dust the frame to keep it clean.
- Periodically check the frame’s fasteners and wall mount for security.
3 reviews for Wooden Photo Frame for Friends
Loading...
Vendor Information
- Store Name: Good Office Supplies
- Vendor: Good Office Supplies
- No ratings found yet!
Product Location
32 The Broadway, Ealing, Greenford, UB6 9PT, United Kingdom-

Pyrex Classic 1.5L Oval Dish, 25cm x 20cm
£3.73 Add to basket -
Duzzit 300ml Furniture Polish
£1.09 Add to basket -
APOLLO Natural Rubberwood Salad/Fruit Bowl, 25 x 10 x 25 cm
£7.91 Add to basket -
SISTEMA SANDWICH LUNCH BOX 450ML VARIOUS COLORS – SINGLE PIECE
£2.08 Add to basket -
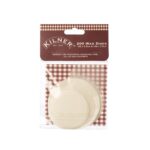
KILNER Wax Discs Pack of 200 (100 pieces of 5.5cm and 100 pieces of 7.5cm)
£1.12 Add to basket -
85ML Cherry Blossom Sports Shoe Whitener
£1.97 Add to basket


Wajiha (verified owner) –
I’ve been buying from this wholesaler for months, and I couldn’t be happier. The product quality is always spot on, and the delivery is always timely.
Charles (verified owner) –
I’ve had multiple orders from this wholesaler, and each time, I’ve been impressed. The products are high-quality, and their customer service is excellent.
Vincent (verified owner) –
I can always count on this wholesaler for the best products. They’re reliable, and their customer service is always friendly and helpful.