Description
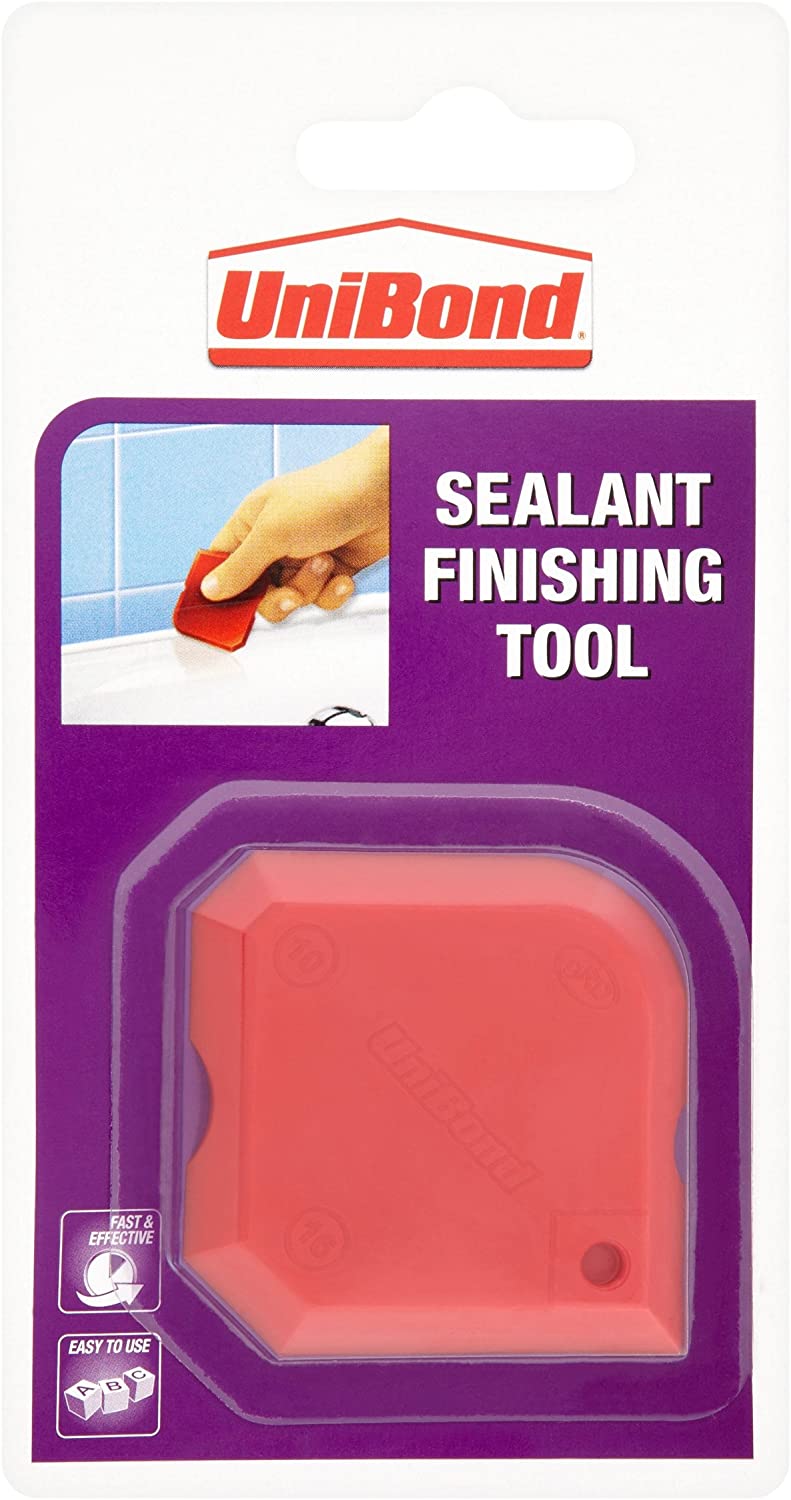
How to Use the UNIBOND Sealant Finishing Tool
Step 1: Gather Your Materials
- UNIBOND Sealant Finishing Tool
- Sealant or caulk of your choice
- Protective gloves (optional)
- Cleaning cloth or paper towels
Step 2: Prepare the Area
- Ensure the surface where the sealant will be applied is clean and dry.
- If necessary, remove any old sealant using a suitable remover tool.
- Apply masking tape to areas adjacent to where the sealant will be applied for a clean edge.
Step 3: Apply the Sealant
- Cut the nozzle of the sealant tube at a 45-degree angle to your desired bead size.
- Load the tube into a caulking gun.
- Apply the sealant evenly along the joint or crack.
Step 4: Use the UNIBOND Sealant Finishing Tool
- Select the appropriate edge or profile on the tool for your desired finish.
- Place the tool at the starting point of the sealant bead.
- Gently drag the tool along the bead, applying even pressure to smooth the sealant.
Step 5: Clean Up
- Wipe away any excess sealant with a clean cloth or paper towel.
- Remove the masking tape before the sealant dries for a clean edge.
- Rinse and clean the UNIBOND Sealant Finishing Tool for future use.
Additional Tips
- Practice on a scrap piece before applying to the final surface if you are a beginner.
- Work in small sections to ensure the sealant doesn’t dry out before smoothing.
- Always follow the manufacturer’s instructions for the sealant you are using for best results.
6 reviews for UNIBOND SEALANT SMOOTHING TOOL
Loading...
Vendor Information
- Store Name: Good Office Supplies
- Vendor: Good Office Supplies
- No ratings found yet!
Product Location
32 The Broadway, Ealing, Greenford, UB6 9PT, United Kingdom-
PAPER FUSIBLE WEB WITH IRON BACKING – SINGLE PACK
£1.64 Add to basket -
COUNTY LABELS ON A ROLL – PACK OF 250
£1.09 Add to basket -
Challenge Bright 75mm Round Wire Nails – 225g
£1.09 Add to basket -
Black and Pink Cat Eye Mask for Halloween Party Costume – Suitable for Men, Women, and Girls
£0.65 Add to basket -
Set of 3 Mini Brushes for Pipe Cleaning
£0.96 Add to basket -
Windsor Ice Cream Spoon Set – Stainless Steel, Pack of 2
£1.53 Add to basket


Khaleel (verified owner) –
Highly satisfied with the products I ordered. The wholesaler always provides great quality and reliable service. I will continue buying here.
Kaamil (verified owner) –
Couldn’t ask for a better experience! The products were high-quality, and the wholesaler went above and beyond to ensure I was satisfied with my order.
Lucy (verified owner) –
I love the products I purchased! The wholesaler is reliable, and I always get my orders in perfect condition and on time.
Bashar (verified owner) –
I love this wholesaler! The products are of superior quality, and I’ve never had an issue with shipping. Definitely my go-to place for business supplies.
Tariq (verified owner) –
Absolutely fantastic experience! I’ve been ordering from this wholesaler for a while now, and they consistently deliver top-quality products.”
Jack (verified owner) –
Top-notch products and incredible service! I will continue to buy from this wholesaler because they never disappoint.