The Metal Baking Cookie Cutters Moulds Pack of 12 includes a variety of assorted shapes, perfect for enhancing your baking experience. These cookie cutters are likely made of…
£1.65
- Metal baking cookie cutters moulds
- Pack contains 12 assorted shapes
- Shapes include heart, flower, circle, and star
- Prices are per unit unless otherwise stated
- Colours and designs may vary from photos
- Sizes are approximate
- Stock availability may vary
- Packaging colour might differ from what is shown
Description
How to Use Metal Baking Cookie Cutters
Step 1: Prepare Your Dough
- Choose your favorite cookie recipe and prepare the dough as instructed.
- Chill the dough in the refrigerator for the recommended time to make it easier to handle.
Step 2: Roll Out the Dough
- Lightly flour a clean surface to prevent the dough from sticking.
- Using a rolling pin, roll out the dough to your desired thickness, usually about 1/4 inch thick.
Step 3: Choose Your Cookie Cutter
- Select a shape from the pack of 12 assorted shapes that suits your theme or preference.
- Note that shapes include options like heart, flower, circle, and star.
Step 4: Cut Out the Cookies
- Press the selected cookie cutter firmly into the rolled-out dough.
- Gently lift the cutter and remove the excess dough around the shape.
- Repeat the process, gathering and re-rolling scraps as needed.
Step 5: Transfer to Baking Sheet
- Carefully transfer the cut-out shapes to a baking sheet lined with parchment paper.
- Leave some space between each cookie to allow for spreading during baking.
Step 6: Bake Your Cookies
- Preheat your oven according to your recipe’s instructions.
- Bake the cookies for the recommended time until they are golden brown.
- Allow them to cool on the baking sheet for a few minutes before transferring to a wire rack.
Step 7: Decorate (Optional)
- Once the cookies have cooled completely, add decorations if desired.
- You can use icing, colored sugar, sprinkles, or any other decorative elements.
Step 8: Enjoy!
- Your cookies are ready to enjoy. Serve them fresh or store them in an airtight container.
Shipping Countries: United Kingdom (UK)
Ready to ship in 3-5 business days
Shipping Policy
Orders over £50 FREE Shipping
International orders, please contact us by email before lacing orders.
Refund Policy
Refund policy
Non-faulty items must be returned within 14 Days. We reserve the right to charge a restocking fee of 50% if we agree to unused & unopened returns. All items & packaging will be inspected, we do not pay for or contribute towards postage or shipping fees, you must used tracked services as we do not accept untracked.
Returns on smoking and e-cigarette items are not accepted.
We operate a 5% margin for broken or faulty goods.
The risk of damage to or loss of the goods passes to you at the time of delivery or the time we attempt delivery. This is when the goods are collected if you fail to take delivery at the agreed time.
Other than implied warranties and guarantees under the law, business-to-business sales are not covered by warranties or guarantees.
Orders are despatched by pallet or by box for smaller deliveries. In the event that the pallet or wrapping shows any signs of damage, please notify us immediately by emailing help@m8w.co.uk and noting it on the delivery manifest. If the order is below £750 + VAT and not sent on a pallet, we do not take any responsibility for damages or issues with any products including liquids, glass etc.
Once the goods leave our warehouse with our chosen carrier, it is your responsibility to inquire if you require insurance. The goods are not insured by default, so it is important to discuss this with us prior to placing your order so that we can get a quote for you for the premium to cover the value of the goods. If there is any evidence of damage during transit, the delivery note should be noted and reported immediately to customer services. Never accept delivery if there is evidence of significant damage.
Our customer service team must be notified within 72 hours of any shortages or damages above 5%. In the event that this timeframe does not apply, all claims will be deemed waived and completely barred.
We charge an administration/picking/packing fee of 25% of the order value plus any delivery charges incurred for cancelled or refunded orders. Refunds are not available for any deposits paid.
The cost of returning damaged or faulty items to us for inspection must be borne by you. Returning items is your responsibility, including handling and shipping.
Once we receive damaged returned goods, we will inspect them and determine whether or not liability can be accepted. We will notify you as soon as the outcome is known.
There will be no liability beyond the value of the goods.
Opened and non-originally packaged goods will not be accepted for return.
Please also refer to our Terms & Conditions page for further information and policies.
Vendor Information
- Store Name: TK Wholesaler
- Vendor: TK Wholesaler
- No ratings found yet!
Product Location
UB8 9PZ, Uxbridge, Greater London, England, United Kingdom-
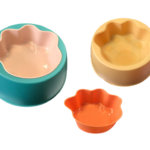
The “Plastic 2 in 1 Pet Cat Dog Food Bowl with Paw Design” is a pet accessory designed for feeding cats and dogs. It features a dual-compartment setup, allowing you to serve…
£0.83 Add to basket -
**Product**: Pet Dog Toy
£0.72 Add to basket -
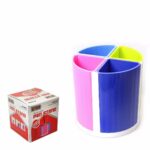
The “4 Compartment Office/Home Stationery Pen Stand Multi Colour 4058” is likely a desk organizer designed to hold and organize various office or home stationery items such as…
£1.10 Add to basket -
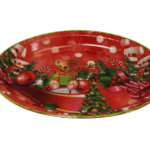
The item you’re referring to is an Oval Plastic Christmas Party Serving Tray with Printed Designs. It measures 45 x 34 cm and comes in assorted designs, labeled with the code…
£3.25 Add to basket -
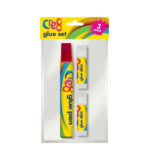
The “Cre8 Liquid and Stick Glue Set Pack of 3 Assorted Glues P2298” appears to be a product that contains three different types of glue, possibly including both liquid and stick…
£0.76 Add to basket -
The Empire Clear Round Tumbler Drinking Glasses are a set of six glasses, each with a capacity of 405cc. These are typically used for serving beverages and have a simple, clear…
£7.65 Add to basket




Reviews
There are no reviews yet.