
Star Pack of 30 White Screw Caps & Covers, Sizes 6 & 8
£0.76
Last updated on October 27, 2025 4:52 am Details
Report Abuse

Description
How to Use the STAR PACK 30 SCREW CUP & COVER NOS 6 & 8 WHITE
Introduction
The STAR PACK 30 Screw Cup & Cover is designed to provide a neat and professional finish to your screw installations. This guide will help beginners use the product effectively.
Materials Needed
- STAR PACK 30 Screw Cup & Cover NOS 6 & 8 WHITE
- Appropriate screwdriver for your screws
- Screws (Nos 6 and 8)
- Power drill (optional, for pre-drilling)
Steps to Use
Step 1: Prepare Your Tools and Work Area
- Gather all necessary tools and materials listed above.
- Ensure your work area is clean and safe for installation.
Step 2: Pre-drill Holes (Optional)
- If working with hard materials, use a power drill to pre-drill pilot holes for your screws. This prevents splitting and makes it easier to insert screws.
Step 3: Insert Screws
- Select the appropriate screws (Nos 6 or 8) for your application.
- Use a screwdriver to insert the screws securely into the surface.
Step 4: Attach Screw Cups
- Place a screw cup over each screw head. Ensure it fits snugly around the screw.
Step 5: Apply Covers
- Snap the cover into place over each screw cup to hide the screw head and provide a clean finish.
Tips for Best Results
- Ensure you are using the correct size screw cup and cover for your screws.
- Practice on a scrap piece of material if you are new to using screw cups and covers.
- Check that the covers are securely snapped into place to avoid them coming loose over time.
Conclusion
Using the STAR PACK 30 Screw Cup & Cover NOS 6 & 8 WHITE is a straightforward process that enhances the appearance of your finished project. Follow these steps and tips to achieve a professional look.
2 reviews for Star Pack of 30 White Screw Caps & Covers, Sizes 6 & 8
Loading...
Vendor Information
- Store Name: Good Office Supplies
- Vendor: Good Office Supplies
- No ratings found yet!
Product Location
32 The Broadway, Ealing, Greenford, UB6 9PT, United Kingdom-

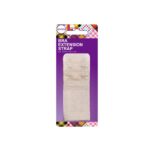
Bra Extender Strap in Various Colors – 3.8cm x 3cm x 2cm
£0.65 Add to basket -
18” Round Foil Balloon with Unique Bright Confetti Design – Number 21
£0.94 Read more -
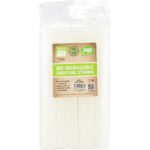
PPS White 23cm Biodegradable Compostable Party Drinking Straws – Pack of 80
£1.23 Add to basket -
Tallon A4 Activity Pad – 70 Sheets
£0.76 Add to basket -
60CM Stainless Steel Flat Metal Turkey Style Barbecue Skewers
£2.37 Add to basket -
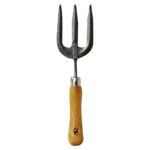
Hand Fork with Wooden Handle
£1.20 Add to basket


Gufrana (verified owner) –
Wonderful products, great service, and timely delivery. I’ll definitely continue shopping here for my business needs.
Izma (verified owner) –
I’ve been purchasing from this wholesaler for months, and each time I’m impressed. The products are great, and shipping is quick and hassle-free.