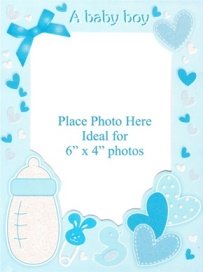
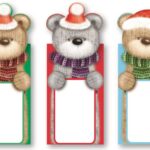
Set of 6 Glitter Birth Announcement Photo Cards for Baby Boys or Girls with Envelopes – Newborn
£0.72
Last updated on October 27, 2025 4:47 am Details
Report Abuse

Description
How to Use 6 Baby Boy/Girl Birth Announcement Photo Glitter Cards
Step 1: Prepare Your Photos
- Select a photo of your newborn that you would like to use for the announcement.
- Make sure the photo is of high quality and fits well within the card’s dimensions.
Step 2: Customize Your Message
- Decide on the message you want to include, such as the baby’s name, birth date, weight, and a personal note.
- Write your message clearly and concisely, ensuring it fits within the space provided on the card.
Step 3: Assemble the Card
- Place the photo in the designated area on the card.
- Secure the photo with adhesive if necessary, ensuring it is centered and straight.
- Write or print your customized message on the card.
Step 4: Insert the Card into the Envelope
- Carefully fold the card, if required, to fit it into the envelope.
- Insert the card into one of the provided envelopes.
Step 5: Address and Send
- Write the recipient’s address on the envelope clearly.
- Add your return address on the back of the envelope.
- Apply the appropriate postage stamp.
- Send the card through the mail or deliver it personally.
Additional Tips
- Consider adding a personal touch by decorating the card with stickers or additional embellishments.
- Double-check all written content for spelling and accuracy before sending.
- If you’re unsure about the layout, create a draft or sample card first.
3 reviews for Set of 6 Glitter Birth Announcement Photo Cards for Baby Boys or Girls with Envelopes – Newborn
Loading...
Vendor Information
- Store Name: Good Office Supplies
- Vendor: Good Office Supplies
- No ratings found yet!
Product Location
32 The Broadway, Ealing, Greenford, UB6 9PT, United Kingdom-

ANKER HIGHLIGHTER PEN SET, PACK OF 5
£0.76 Add to basket -

CROMPTON EDISON SCREW / ES 4.8W E27 4000K COOL WHITE LED GOLF BALL BULB
£1.82 Add to basket -
20g Super Strong Adhesive Glue
£1.16 Add to basket -
57mm Single Arm Tea Strainer with Drip Bowl
£2.30 Add to basket -
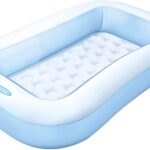
INTEX 57403NP Soft Rectangular Baby Pool, 65.5″ x 39.5″ x 10
£11.87 Add to basket -
Blue 76 cm Giant Standing Foil Number 6 Balloon – Unique Party
£1.09 Read more


Caleb (verified owner) –
I’ve been buying from this wholesaler for months, and I couldn’t be happier. The product quality is always spot on, and the delivery is always timely.
Maahnoor (verified owner) –
This wholesaler has the best customer service. They went above and beyond to ensure I was happy with my order. The product quality is excellent too!
Badr-al-Din (verified owner) –
The quality of the products I received was outstanding, and the shipping was fast. I will be a returning customer for sure.