Set of 2 Replacement Vacuum Cleaner Drive Belts for Panasonic MCE4000 by 4 Your Home
£1.20
Last updated on January 5, 2025 6:48 am Details
Report Abuse
Description
How to Use: Panasonic Vacuum Cleaner Driver Belts
Step 1: Gather Necessary Tools
- Philips head screwdriver
- Replacement driver belts (MCE4000 model)
Step 2: Ensure Safety
- Unplug the vacuum cleaner from the power source.
- Place the vacuum on a stable and flat surface.
Step 3: Access the Belt Area
- Turn the vacuum cleaner over to access the bottom plate.
- Use the screwdriver to remove screws securing the bottom plate.
- Carefully lift the bottom plate to expose the brush roll and belt area.
Step 4: Remove the Old Belt
- Locate the old belt attached to the motor shaft and brush roll.
- Slide the old belt off the motor shaft and remove it from the brush roll.
Step 5: Install the New Belt
- Take one of the new driver belts from the package.
- Loop the new belt around the motor shaft.
- Stretch the belt over the brush roll, ensuring it is aligned properly.
Step 6: Reassemble the Vacuum
- Replace the bottom plate and secure it with screws using the screwdriver.
- Ensure all components are tightly secured.
Step 7: Test the Vacuum Cleaner
- Plug the vacuum cleaner back into the power source.
- Turn on the vacuum to test if the new belt is functioning correctly.
- Listen for any unusual noises or check for poor suction indicating improper installation.
Troubleshooting Tips
- If the vacuum cleaner does not work, double-check belt alignment and tightness.
- Ensure the brush roll rotates freely and is not obstructed.
- Consult the vacuum cleaner’s manual for additional guidance specific to the model.
3 reviews for Set of 2 Replacement Vacuum Cleaner Drive Belts for Panasonic MCE4000 by 4 Your Home
Loading...
Vendor Information
- Store Name: Good Office Supplies
- Vendor: Good Office Supplies
- No ratings found yet!
Product Location
32 The Broadway, Ealing, Greenford, UB6 9PT, United Kingdom-
750ml Round Sunpet Plastic Food Storage Jars, Pack of 2
£0.94 Add to basket -
GSD Pack of 24 Birthday Party Candles with Holders
£0.54 Add to basket -
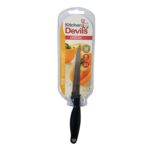
KITCHEN DEVILS 11 CM CHEF’S KNIFE
£6.22 Add to basket -
6 Assorted Essential Oil Fragrances
£0.81 Read more -
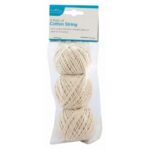
BLACKSPUR Pack of 3 Rolls of Household Cotton Twine
£0.80 Add to basket -
FACE FACTS 60ML FIRMING WASH-OFF MASK
£0.83 Add to basket





Salim (verified owner) –
My experience with this wholesaler was excellent. The products were of great quality, and I was impressed by the speed of delivery.
Eiman (verified owner) –
I’ve been a loyal customer for a while now. The product quality is outstanding, and I’ve never had an issue with shipping or customer service.
Zahra (verified owner) –
Great experience with this wholesaler. Their products are fantastic, and their customer service is quick to respond and help with anything.