Red and Grey B10P White 13 Amp Single Gang Socket
£1.89
Last updated on June 26, 2025 12:37 am Details
Report Abuse
Description
How to Use the RED GREY B10P WHITE SINGLE / 1 GANG 13AMP SOCKET
Introduction
This guide will help you understand how to safely and effectively use the RED GREY B10P WHITE SINGLE / 1 GANG 13AMP SOCKET. Please follow the instructions carefully to ensure proper installation and usage.
Tools Required
- Flathead screwdriver
- Phillips screwdriver
- Voltage tester
- Wire stripper
Installation Steps
1. Safety Precautions
- Ensure the power supply to the socket is turned off at the circuit breaker.
- Use a voltage tester to confirm that there is no power in the wires.
2. Remove Existing Socket (if applicable)
- Unscrew the faceplate of the existing socket using the appropriate screwdriver.
- Carefully disconnect the wires from the old socket.
3. Connect the Wires
- Use a wire stripper to strip about 10mm of insulation from the ends of the wires.
- Connect the Live (brown or red) wire to the terminal marked “L”.
- Connect the Neutral (blue or black) wire to the terminal marked “N”.
- Connect the Earth (green/yellow) wire to the terminal marked with the earth symbol or “E”.
4. Secure the Socket
- Carefully tuck the wires into the back box, ensuring no wires are pinched.
- Align the socket with the screw holes and fix it in place using the screws provided.
5. Test the Socket
- Turn the power back on at the circuit breaker.
- Use a voltage tester to ensure the socket is receiving power.
- Plug in a small appliance to test the functionality of the socket.
Conclusion
Once the socket is installed and tested, it is ready for use. Always ensure that electrical installations are carried out by a qualified electrician if you are uncertain about any step in the process. Regularly check the socket for any signs of damage or wear.
2 reviews for Red and Grey B10P White 13 Amp Single Gang Socket
Loading...
Vendor Information
- Store Name: Good Office Supplies
- Vendor: Good Office Supplies
- No ratings found yet!
Product Location
32 The Broadway, Ealing, Greenford, UB6 9PT, United Kingdom-
ELYSIUM HEMP SEED OIL MUSCLE & BACK SOAK 450G
£0.86 Add to basket -
BETTINA LINT ROLLER WITH 2 REFILLS
£0.98 Add to basket -
Decorative Pattern PVC Self-Adhesive Wallpaper 45cm x 1.5m
£0.76 Add to basket -
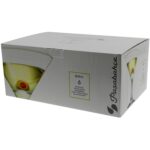
PASABAHCE BISTRO MARTINI COCKTAIL GLASSES – SET OF 6
£6.15 Add to basket -
Pack of 6 Assorted Color 12-Inch Latex Balloons for 90th Birthday Celebration – Blue Glitz Theme
£0.99 Read more -
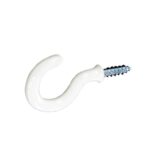
SECURIT S6302 White Shouldered Cup Hooks, 32mm, Pack of 5
£0.61 Add to basket




Qamar (verified owner) –
I’ve bought from many wholesalers, but none have compared to this one. The quality of their products is exceptional, and they always deliver on time.
Victoria (verified owner) –
The products I’ve purchased are top-notch. The wholesaler always ensures quick shipping and excellent customer service. Highly recommend!