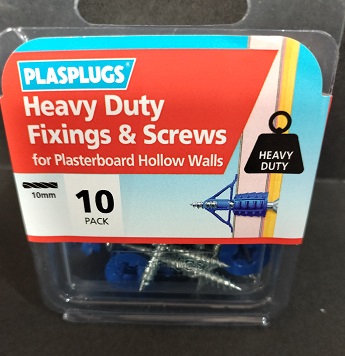
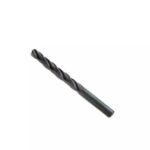
PLASPLUGS High-Strength Plasterboard Anchors & Screws Pack of 10
£1.89
Last updated on January 5, 2025 10:33 am Details
Report Abuse

Description
How to Use PLASPLUGS Heavy Duty Plasterboard Fixings & Screws
Step-by-Step Instructions
1. Gather Your Tools and Materials
- PLASPLUGS Heavy Duty Plasterboard Fixings & Screws (10/PK)
- Screwdriver or drill with appropriate bit
- Hammer (optional)
- Measuring tape
- Pencil or marker
2. Mark the Spot
- Use the measuring tape to determine where you want to place the fixing.
- Mark the spot lightly with a pencil or marker.
3. Pre-drill or Punch a Hole
- If the plasterboard is thick or hard, pre-drill a small pilot hole.
- If the plasterboard is soft, you may be able to simply punch a hole using the fixing itself or a hammer.
4. Insert the Fixing
- Take the plasterboard fixing and push it into the hole.
- You may need to lightly tap it with a hammer to ensure it is flush with the wall.
5. Secure with the Screw
- Align the screw with the center of the fixing.
- Use a screwdriver or drill to drive the screw into the fixing until it is securely in place.
6. Test the Installation
- Gently pull on the object or fitting you have attached to ensure it is securely fastened.
- If it feels loose, tighten the screw further.
Tips for Best Results
- Ensure you are using the correct size of drill bit for pre-drilling if needed.
- Do not overtighten the screws, as this may damage the plasterboard.
- Avoid placing fixings too close to the edge of the plasterboard to prevent splitting.
2 reviews for PLASPLUGS High-Strength Plasterboard Anchors & Screws Pack of 10
Loading...
Vendor Information
- Store Name: Good Office Supplies
- Vendor: Good Office Supplies
- No ratings found yet!
Product Location
32 The Broadway, Ealing, Greenford, UB6 9PT, United Kingdom-

PASABAHCE VILLAGE 700ML GLASS CARAFE
£2.08 Add to basket -
Cake Carrier Caddy Box, 7 Liters, 345mm x 155mm
£4.94 Add to basket -
Car Pride Polishing and Drying Cloth
£1.03 Add to basket -
Set of 5 Whitefurze 12.7cm Terracotta Garden Pots
£1.38 Add to basket -
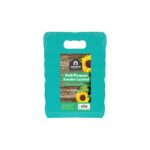
SHEDMATS VERSATILE KNEELING PAD
£2.19 Add to basket -
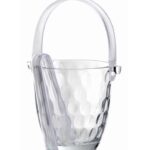
SOZALI Glass Ice Bucket with Plastic Tongs and Handle
£1.75 Add to basket


Nihlah (verified owner) –
My experience with this wholesaler was excellent. The products were of great quality, and I was impressed by the speed of delivery.
Inaya (verified owner) –
Amazing service and fantastic products. I’ve ordered several times now, and every experience has been positive. Highly recommend this wholesaler!