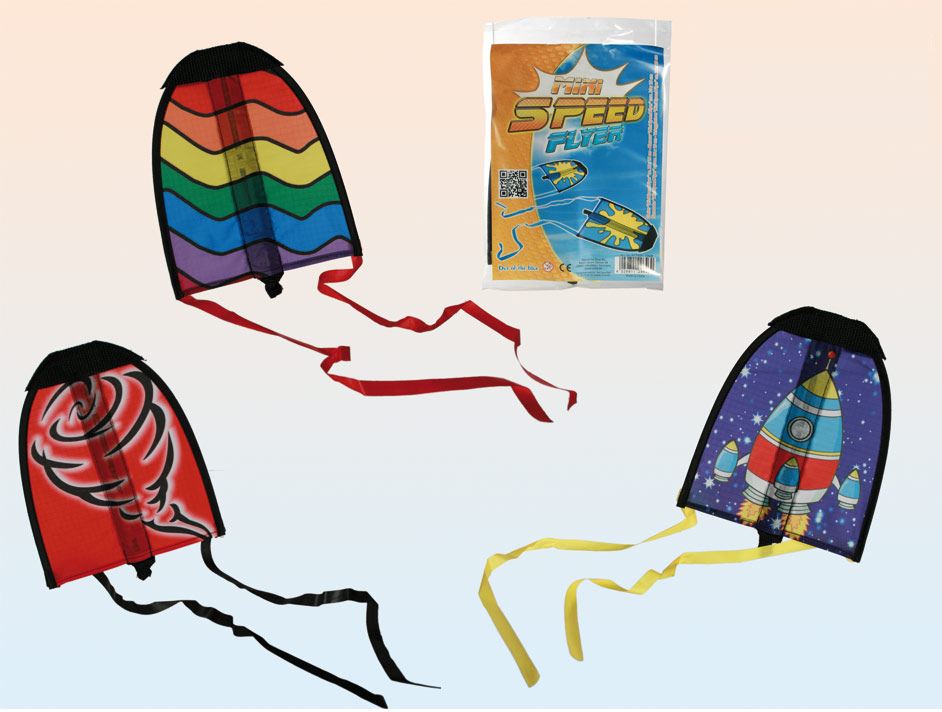
Mini Speed Flyer Assorted Design Plastic Glider with Rubber Band Launcher
£1.34
Last updated on October 26, 2025 2:46 am Details
Report Abuse

Description
How to Use the Plastic Glider with Rubber Band Starter
Contents
- Mini Speed Glider
- Rubber Band Launcher
Step-by-Step Instructions
1. Assembly
- Remove the glider and rubber band launcher from the packaging.
- Inspect the glider for any detachable parts. Assemble if necessary by attaching the wings or fins securely.
2. Attaching the Rubber Band
- Locate the hook or notch on the front of the glider.
- Attach one end of the rubber band to this hook or notch.
3. Preparing for Launch
- Hold the glider by its body, keeping the rubber band free.
- With your other hand, pull back the rubber band using the launcher. Make sure the band is taut and aligned with the glider.
4. Launching the Glider
- Aim the glider in the desired direction. For best results, aim slightly upward.
- Release the rubber band from the launcher while gently pushing the glider forward with your hand.
5. Post-Flight
- Retrieve the glider from its landing spot.
- Inspect for any damages before repeating the launch.
Tips for Best Performance
- Use in open spaces to avoid obstacles.
- Adjust the angle of launch to experiment with different flight paths.
Safety Precautions
- Ensure the area is clear of people and breakable objects before launching.
- Do not aim at people or animals.
3 reviews for Mini Speed Flyer Assorted Design Plastic Glider with Rubber Band Launcher
Loading...
Vendor Information
- Store Name: Good Office Supplies
- Vendor: Good Office Supplies
- No ratings found yet!
Product Location
32 The Broadway, Ealing, Greenford, UB6 9PT, United Kingdom-

17x4cm High Brushed Metallic Self-Adhesive ‘Private’ Sign
£0.61 Add to basket -
12-Foot Pink Glitz 70 Prism Banner
£0.73 Add to basket -
Taylors Eye Witness 27cm Grey Silicone Slotted Turner
£4.39 Add to basket -
TIGER 3 A4 NOTEBOOK – TRANSPARENT COVER
£0.76 Add to basket -
Pink Floral Prism 6th Birthday Party Banner – 9ft by Unique Party
£0.83 Read more -
Set of 4 Tallon Brushes with Chunky Plastic Handles
£0.79 Add to basket


Yusuf (verified owner) –
This is the best wholesaler I’ve dealt with. The products are always of the highest quality, and their customer support is outstanding.
Aayat (verified owner) –
This is the best wholesaler I’ve dealt with. The products are always of the highest quality, and their customer support is outstanding.
Walter (verified owner) –
Fantastic wholesaler with fast shipping and high-quality products. I’ll definitely be purchasing from them again.