Description
How to Use the Kingfisher 3 MM Trimmer Line
Step 1: Gather Your Tools
- Kingfisher 3 MM Trimmer Line
- Grass trimmer or string trimmer
- Protective gloves
- Safety goggles
- Scissors or cutting tool
Step 2: Prepare Your Trimmer
- Turn off and unplug your trimmer if it is electric. If it is gas-powered, ensure it is off and cool.
- Lay the trimmer on a flat surface for easy access.
Step 3: Remove Old Trimmer Line
- Locate the trimmer head where the line is housed.
- Follow the manufacturer’s instructions to open the trimmer head, typically by pressing tabs or unscrewing the cap.
- Remove any remaining old trimmer line.
Step 4: Install New Kingfisher 3 MM Trimmer Line
- Cut a suitable length of the Kingfisher 3 MM trimmer line, usually around 10 to 15 feet, depending on your trimmer model.
- Find the center of the line and fold it in half.
- Insert the folded center into the spool’s notch, if applicable.
- Wind each end of the line around the spool in the direction indicated by the arrows on the spool.
- Leave about 6 inches of line unwound at each end.
- Secure the ends of the line in the notches provided on the spool.
Step 5: Reassemble the Trimmer Head
- Place the spool back into the trimmer head.
- Pull the line ends through the eyelets on the trimmer head.
- Close the trimmer head by snapping it shut or screwing the cap back on, ensuring it is secure.
Step 6: Use Your Trimmer Safely
- Put on protective gloves and safety goggles before using the trimmer.
- Start your trimmer according to the manufacturer’s instructions.
- Use the trimmer in a steady sweeping motion to cut grass and weeds.
- Always maintain a safe distance from other people and pets while using the trimmer.
Step 7: Maintenance
- Regularly check the trimmer line for wear and replace it as needed.
- Clean the trimmer head to prevent debris buildup.
- Store your trimmer in a dry place when not in use.
4 reviews for KINGFISHER 3 MM TRIMMER CORD
Loading...
Vendor Information
- Store Name: Good Office Supplies
- Vendor: Good Office Supplies
- No ratings found yet!
Product Location
32 The Broadway, Ealing, Greenford, UB6 9PT, United Kingdom-
ORACSTAR PRO097 UNIVERSAL ACCESS PLUG 40MM
£0.72 Add to basket -
DEKTON L-SHAPED MAGNETIC PLATES, PACK OF 2
£1.16 Add to basket -
KILNER CLEAR 0.25 LITRE CLIP-TOP PRESERVE BOTTLE
£2.30 Add to basket -
PESTSHIELD ANT TRAPS 3-PACK, GLUE TRAPS WITHOUT POISON
£0.80 Add to basket -
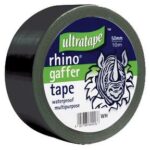
Rhino Black Gaffer Tape 50mm x 10m – RT01065010BKRH
£0.76 Add to basket -
Pack of 2 Citronella Bamboo Torches by Zero In
£7.69 Add to basket









Wajiha (verified owner) –
Great wholesaler to work with. The products are high-quality, and their service is always professional and prompt.
Matthew (verified owner) –
I love this wholesaler! The products are of superior quality, and I’ve never had an issue with shipping. Definitely my go-to place for business supplies.
Qiraat (verified owner) –
I trust this wholesaler for all my business needs. Their products are top-tier, and they always deliver on time with excellent customer service.
Kevin (verified owner) –
The product quality exceeded my expectatios! I will definitely be ordering from this wholesaler again. The service was also exceptional.