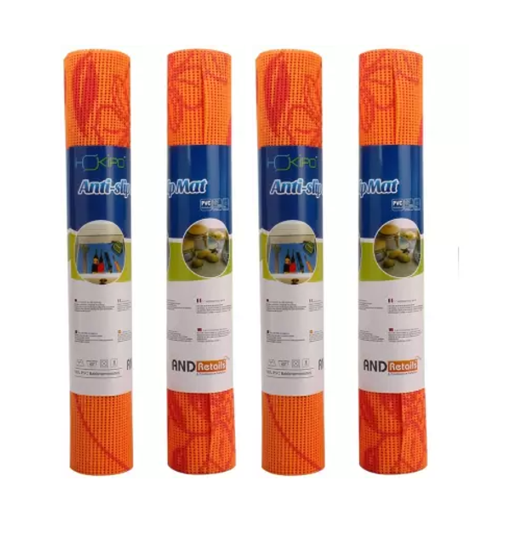
It seems like you’re referring to a product description for a kitchen storage drawer anti-slip mat. This particular mat measures 30 x 90 cm and features a floral pattern. It…
£0.72
- Kitchen Storage Drawer Anti-Slip Mat
- Dimensions: 30 x 90 cm
- Features a floral pattern
- Available in assorted colours: Orange, Green, Pink
- Colours and designs may vary from photos
- Sold individually (price is per 1 unit)
- Sizes are approximate
- Stock availability may vary
Last updated on June 26, 2025 5:31 am Details
Report Abuse
Description
How to Use the Kitchen Storage Drawer Anti-Slip Mat
Step 1: Unpack the Product
- Carefully remove the mat from its packaging.
- Check the size, pattern, and color as expected. Note that colors are sent randomly.
Step 2: Prepare the Drawer
- Empty the contents of the drawer where you plan to use the mat.
- Clean the drawer surface to ensure it is free from dust and debris.
- Allow the drawer to dry completely if you used any cleaning products.
Step 3: Cut the Mat (If Necessary)
- Measure the interior dimensions of the drawer.
- If the mat is too large, use a pair of scissors to cut it to fit the dimensions of your drawer.
- Ensure the cut edges are straight for a neat finish.
Step 4: Place the Mat in the Drawer
- Lay the mat flat on the bottom of the drawer.
- Smooth out any bubbles or wrinkles to ensure a flat surface.
Step 5: Organize Your Items
- Place your kitchen items back into the drawer, arranging them on top of the mat.
- Ensure items are evenly distributed to maintain the mat’s position.
Step 6: Maintenance
- Periodically remove the mat to clean both the drawer and the mat itself.
- Wipe down the mat with a damp cloth as needed to maintain cleanliness.
- Allow the mat to dry completely before placing it back in the drawer.
Additional Tips
- Consider purchasing multiple mats for larger drawers or additional storage areas.
- Use leftover mat pieces for smaller storage spaces or shelves.
Shipping Countries: United Kingdom (UK)
Ready to ship in 3-5 business days
Shipping Policy
Orders over £50 FREE Shipping
International orders, please contact us by email before lacing orders.
Refund Policy
Refund policy
Non-faulty items must be returned within 14 Days. We reserve the right to charge a restocking fee of 50% if we agree to unused & unopened returns. All items & packaging will be inspected, we do not pay for or contribute towards postage or shipping fees, you must used tracked services as we do not accept untracked.
Returns on smoking and e-cigarette items are not accepted.
We operate a 5% margin for broken or faulty goods.
The risk of damage to or loss of the goods passes to you at the time of delivery or the time we attempt delivery. This is when the goods are collected if you fail to take delivery at the agreed time.
Other than implied warranties and guarantees under the law, business-to-business sales are not covered by warranties or guarantees.
Orders are despatched by pallet or by box for smaller deliveries. In the event that the pallet or wrapping shows any signs of damage, please notify us immediately by emailing help@m8w.co.uk and noting it on the delivery manifest. If the order is below £750 + VAT and not sent on a pallet, we do not take any responsibility for damages or issues with any products including liquids, glass etc.
Once the goods leave our warehouse with our chosen carrier, it is your responsibility to inquire if you require insurance. The goods are not insured by default, so it is important to discuss this with us prior to placing your order so that we can get a quote for you for the premium to cover the value of the goods. If there is any evidence of damage during transit, the delivery note should be noted and reported immediately to customer services. Never accept delivery if there is evidence of significant damage.
Our customer service team must be notified within 72 hours of any shortages or damages above 5%. In the event that this timeframe does not apply, all claims will be deemed waived and completely barred.
We charge an administration/picking/packing fee of 25% of the order value plus any delivery charges incurred for cancelled or refunded orders. Refunds are not available for any deposits paid.
The cost of returning damaged or faulty items to us for inspection must be borne by you. Returning items is your responsibility, including handling and shipping.
Once we receive damaged returned goods, we will inspect them and determine whether or not liability can be accepted. We will notify you as soon as the outcome is known.
There will be no liability beyond the value of the goods.
Opened and non-originally packaged goods will not be accepted for return.
Please also refer to our Terms & Conditions page for further information and policies.
Loading...
Vendor Information
- Store Name: TK Wholesaler
- Vendor: TK Wholesaler
- No ratings found yet!
Product Location
UB8 9PZ, Uxbridge, Greater London, England, United Kingdom-

The “Anti Bird Net Garden Netting” is designed for outdoor use to protect gardens and ponds from birds. The netting measures 2 meters by 10 meters, providing a substantial…
£2.04 Add to basket -
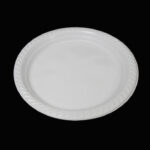
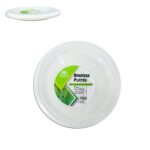
**Size**: Each plate is 9 inches in diameter
£1.09 Add to basket -
Sale!
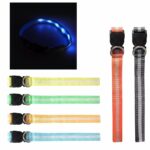
The LED Light Up Dog Collar with Buckle is a stylish and practical accessory for your pet, available in assorted colors. Designed for safety and visibility, this collar features…
Original price was: £71,514,307.15.£715.72Current price is: £715.72. Add to basket -
The Pet Dog Toy Squeaky Yarn Ball with Bones Design is a 7 cm toy designed for dogs. It features a fun squeaky mechanism to engage and entertain pets. The toy is decorated with…
£0.72 Add to basket -
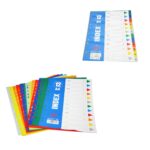
A4 folder dividers, also known as subject punched index color sheets, are used to organize documents within a binder or file. This particular product comes as a 12-pack, model…
£0.50 Add to basket -
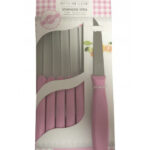
The ROOC Stainless Steel Multipurpose Fruit Knife Set includes six knives, each with a different colored handle. These knives are designed for versatility and are ideal for…
£3.58 Add to basket


Reviews
There are no reviews yet.