Description
How to Use the LED Sign Heart
Step 1: Unpack the LED Sign
- Carefully remove the LED sign from its packaging.
- Ensure that all components are included and intact.
Step 2: Insert Batteries
- Locate the battery compartment on the back of the LED sign.
- Open the compartment by sliding or unscrewing the cover.
- Insert 2 AA batteries, ensuring the correct polarity (+/-).
- Close the battery compartment securely.
Step 3: Turn On the LED Sign
- Locate the power switch, usually found on the side or back of the sign.
- Switch the LED sign to the “ON” position.
- Ensure the sign lights up, indicating it is functioning correctly.
Step 4: Display the LED Sign
- Choose a suitable location to display your LED sign, such as a shelf, table, or wall.
- If mounting on a wall, use appropriate hooks or nails to support the weight of the sign.
- Ensure the sign is placed in a visible and desired location to enhance the ambiance.
Step 5: Maintain Your LED Sign
- Regularly check the battery life and replace batteries as needed.
- Clean the sign with a soft, dry cloth to remove dust and fingerprints.
- Avoid exposing the sign to extreme temperatures or moisture.
Additional Tips
- Consider using rechargeable AA batteries for convenience.
- Use the LED sign as a decorative piece for special occasions or daily ambiance.
2 reviews for Heart-Shaped LED Sign
Loading...
Vendor Information
- Store Name: Good Office Supplies
- Vendor: Good Office Supplies
- No ratings found yet!
Product Location
32 The Broadway, Ealing, Greenford, UB6 9PT, United Kingdom-
Tiger Essentials 33mm Brass Paper Clips, Pack of 100
£0.57 Add to basket -
KILNER 0.5 L SQUARE GLASS JAR WITH RUBBER SEAL AND CLIP TOP
£3.29 Add to basket -
AM-TECH 20-Piece Hex Key Set
£1.82 Add to basket -
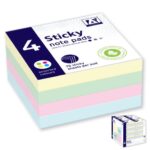
ANKER STATIONERY 4-PACK STICKY NOTE PADS
£0.72 Add to basket -
PUKKA Gold Bubble Mailers D 200mm x 275mm, Pack of 10
£1.64 Add to basket -
MASTERCOOK Copper Parsi Tall Lota – Hindu Religious Vessel No. 7
£3.94 Add to basket




Dylan (verified owner) –
The quality of their products is unmatched. I’ve purchased from several wholesalers, but none of them come close to the level of service and quality offered here.
Fiza (verified owner) –
I’ve been using this wholesaler for some time now. They consistently deliver high-quality products, and their service is always reliable.