Description
How to Use the Wooden Handle Hand Fork
Introduction
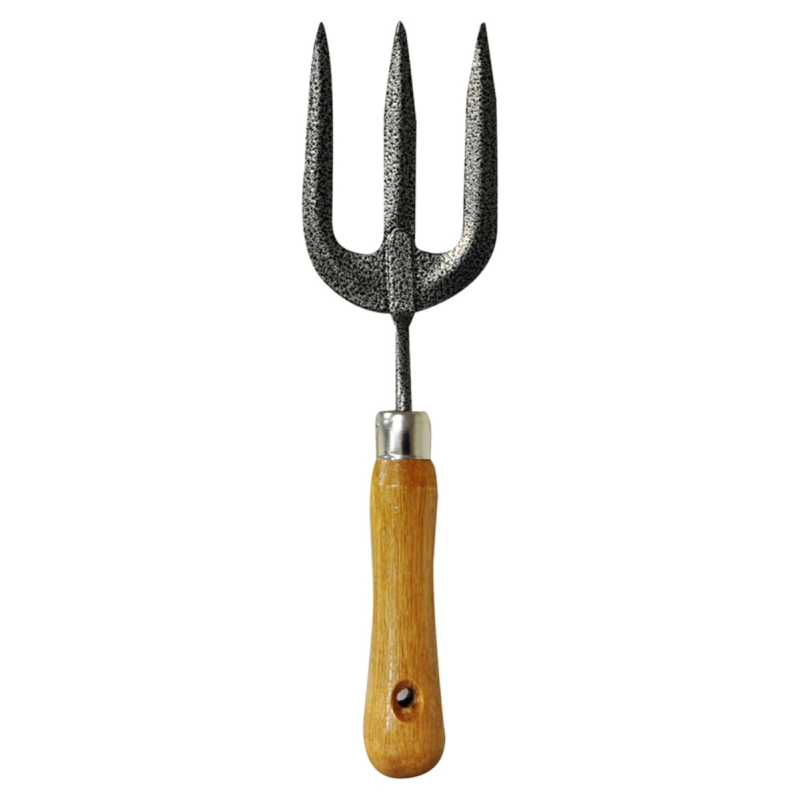
The wooden handle hand fork is an essential gardening tool for beginners and experienced gardeners alike. It is designed to help with tasks such as loosening soil, removing weeds, and mixing in fertilizer. Follow these simple steps to get started using your hand fork effectively.
Steps for Using the Wooden Handle Hand Fork
1. Safety First
- Ensure you are wearing appropriate gardening gloves to protect your hands.
- Clear the area of any sharp objects or debris before starting.
2. Preparing the Soil
- Identify the area where you want to work, such as a flower bed or vegetable garden.
- Remove large rocks or debris from the surface.
3. Using the Hand Fork
- Hold the wooden handle firmly with one hand, ensuring a comfortable grip.
- Insert the tines of the fork into the soil at a slight angle.
- Gently push down to penetrate the soil, then lift to loosen it.
- Repeat this process to break up compacted soil and aerate it thoroughly.
4. Removing Weeds
- Locate unwanted weeds in the soil.
- Use the tines of the fork to dig around the base of the weed.
- Carefully lift the weed out of the soil, ensuring you remove the root.
5. Cleaning and Storage
- After use, clean the tines of the hand fork with water to remove soil and debris.
- Dry the fork thoroughly to prevent rusting.
- Store the hand fork in a dry place, away from moisture and direct sunlight.
Conclusion
By following these steps, you can efficiently use your wooden handle hand fork for various gardening tasks. Regular maintenance and proper storage will ensure its longevity and effectiveness in your gardening activities.
2 reviews for Hand Fork with Wooden Handle
Loading...
Vendor Information
- Store Name: Good Office Supplies
- Vendor: Good Office Supplies
- No ratings found yet!
Product Location
32 The Broadway, Ealing, Greenford, UB6 9PT, United Kingdom-
Dark Green Banqueting Roll, 7m x 1.2m
£2.74 Add to basket -
Candle Snuffer with Metal Handle 453479
£1.93 Add to basket -
Paint Factory Universal Neon Green 200ml
£1.09 Add to basket -
DLUX 150-Pack Disposable Plastic Gloves
£0.98 Add to basket -
Taylors Eye Witness Universal Soft Touch Knife Block with Brush Insert
£20.89 Add to basket -
PESTSHIELD ADVANCED FORMULA ANT & CRAWLING INSECT KILLER SPRAY 300ML
£1.09 Add to basket


Ryder (verified owner) –
Excellent service! I’ve never had an issue with any of my orders. The products are always high quality, and the wholesaler’s team is always helpful.
Rachel (verified owner) –
Such a reliable wholesaler! The products are always top-tier, and shipping is quick and hassle-free. I highly recommend this company!