
CHALLENGE 40MM GALVANIZED CLOUT NAILS, 225G
£1.31
Last updated on January 5, 2025 7:13 am Details
Report Abuse

Description
How to Use Challenge Galvanised Clout Nails 40mm 225g
Challenge Galvanised Clout Nails are versatile and suitable for various DIY projects. Follow these instructions for safe and effective use:
Materials Needed
- Challenge Galvanised Clout Nails 40mm 225g
- Hammer
- Wood or other materials to be nailed
- Protective eyewear (optional but recommended)
Step-by-Step Instructions
Step 1: Prepare Your Workspace
- Ensure your workspace is clean and well-lit.
- Gather all necessary tools and materials.
- Wear protective eyewear for safety.
Step 2: Position the Nail
- Place the material you want to nail on a stable surface.
- Hold a Challenge Galvanised Clout Nail at the desired position on the material.
Step 3: Secure the Nail
- Using a hammer, gently tap the head of the nail to fix it in place.
- Ensure the nail enters the material at a straight angle.
Step 4: Drive the Nail
- Continue to hammer the nail until it is securely embedded into the material.
- Avoid excessive force to prevent damage to the material or bending the nail.
Step 5: Finish and Inspect
- Ensure the nail is flush with the surface of the material.
- Check for stability and make any necessary adjustments.
Safety Tips
- Keep fingers clear of the nail head while hammering.
- Store nails and tools safely out of reach of children.
- Dispose of any bent or damaged nails appropriately.
By following these instructions, you can effectively use Challenge Galvanised Clout Nails for your DIY projects.
2 reviews for CHALLENGE 40MM GALVANIZED CLOUT NAILS, 225G
Loading...
Vendor Information
- Store Name: Good Office Supplies
- Vendor: Good Office Supplies
- No ratings found yet!
Product Location
32 The Broadway, Ealing, Greenford, UB6 9PT, United Kingdom-

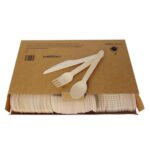
Biodegradable Wooden Cutlery by Ocean Saver – Pack of 150
£5.34 Add to basket -
31L Clear Crystal Storage Box with Lid by WHAM
£3.58 Add to basket -
Chef Aid Polyethylene Cutting Board 25cm x 15cm
£2.70 Add to basket -
Mixed Color Artificial Carnation Flower Bush
£0.87 Add to basket -

SECURIT S5416 White Double-Sided Self-Adhesive Tabs, 12x25mm
£0.96 Add to basket -
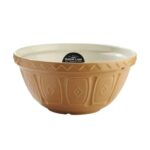
Mason Cash Cane Series 9 Mixing Bowl, 32cm / 5L
£15.94 Add to basket


Related products
-
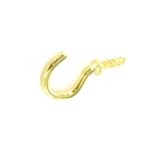
SECURIT S6311 20MM SHOULDERED CUP HOOKS, BRASS, PACK OF 5
£0.39 Add to basket -
ASHLEY DURABLE FELT PROTECTORS, PACK OF 2
£0.44 Add to basket -
SECURIT S6313 32MM Shoulder Cup Hooks, Pack of 5
£0.46 Add to basket -
Extra Small No. 0 Wire Spring Plate Wall Hanger Holder (3.5 – 5 inches) – 1 Piece
£0.43 Add to basket

Aayat (verified owner) –
Very happy with my purchase from this wholesaler. The products arrived promptly, and the quality was exactly what I expected.”
Waheeda (verified owner) –
Amazing products! I’ve been buying from this wholesaler for months, and each time the delivery is prompt, and the quality is consistent. Keep up the great work!