Description
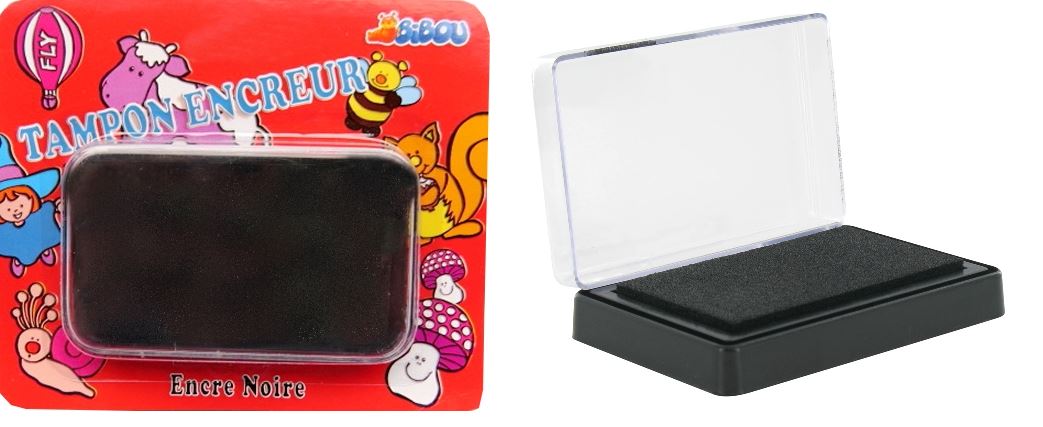
How to Use Stamp Pad Black Ink
Materials Needed
- Stamp Pad Black Ink
- Stamp or object to ink (e.g., finger, hand)
- Paper or surface to transfer the ink
- Cleaning wipes or damp cloth (optional, for cleaning)
Instructions
- Open the Stamp Pad: Carefully remove the lid of the stamp pad to expose the inked surface.
- Prepare Your Object: Ensure the object you want to ink, such as a stamp, finger, or hand, is clean and dry.
- Apply Ink:
- For Stamps: Gently press the stamp onto the ink pad, ensuring it is evenly coated with ink. Avoid pressing too hard to prevent excess ink.
- For Hand/Finger Prints: Lightly press your hand or finger onto the ink pad. Move slightly for even coverage.
- Transfer the Ink:
- For Stamps: Position the inked stamp over the desired area on your document or paper. Press down firmly and evenly to transfer the ink.
- For Hand/Finger Prints: Gently press your inked hand or finger onto the paper or desired surface to create the print.
- Allow to Dry: Let the ink dry for a few minutes to prevent smudging.
- Clean Up: Use a cleaning wipe or a damp cloth to clean ink residue from your hands or stamps.
- Close the Stamp Pad: Securely replace the lid on the stamp pad to prevent the ink from drying out.
Safety Tips
- Ensure children are supervised while using the ink to prevent messes and accidental ingestion.
- Keep the stamp pad closed when not in use to maintain ink quality.
Additional Uses
- Document stamping
- Creative finger painting
- Kids’ art projects
2 reviews for Black Ink Stamp Pad
Loading...
Vendor Information
- Store Name: Good Office Supplies
- Vendor: Good Office Supplies
- No ratings found yet!
Product Location
32 The Broadway, Ealing, Greenford, UB6 9PT, United Kingdom-
AIRPURE Vanilla Cupcake Scented Jar Candle, 510g, Burns Up to 120 Hours
£3.95 Add to basket -
28CM Nonstick Ceramic Casserole with Shrink Packaging
£14.84 Add to basket -
WHITEFURZE CREAM RECTANGULAR LARGE BOWL
£1.64 Add to basket -
Securit S1932 Mortice Latch 75mm, Nickel Plated
£1.38 Add to basket -
Pack of 80 Dinner Money Envelopes
£0.72 Add to basket -
Harris Essentials 0.5 Inch/12mm Paint Brush for Walls & Ceilings
£0.87 Add to basket





Charles (verified owner) –
I trust this wholesaler for all my business needs. Their products are top-tier, and they always deliver on time with excellent customer service.
Ihsan (verified owner) –
This wholesaler offers amazing products at great prices. The shipping was fast, and customer service was responsive and professional.”