AM TECH Set of 3 Countersink Drill Bits
£1.31
Last updated on March 2, 2025 12:54 am Details
Report Abuse
Description
How to Use the AM TECH 3PC Countersink Bit Set
Introduction
The AM TECH 3PC Countersink Bit Set is designed to create a conical hole in materials such as wood, metal, and plastic, allowing the head of a screw or bolt to sit flush with or below the surface. Follow these instructions for safe and effective use.
Tools and Materials Needed
- AM TECH 3PC Countersink Bit Set
- Drill or drill press
- Safety goggles
- Workpiece (wood, metal, plastic, etc.)
- Clamps (optional, for securing the workpiece)
Safety Precautions
- Wear safety goggles to protect your eyes from debris.
- Ensure the workpiece is securely clamped down to prevent movement.
- Check the drill for any faults before use.
Instructions
Step 1: Select the Appropriate Bit
- Choose the correct size countersink bit from the set based on the screw size you are using.
Step 2: Prepare the Drill
- Insert the selected countersink bit into the drill or drill press.
- Tighten the chuck securely to hold the bit in place.
Step 3: Position the Workpiece
- Place the workpiece on a stable surface.
- If necessary, use clamps to hold the workpiece securely.
Step 4: Begin Drilling
- Align the tip of the countersink bit with the pilot hole where the screw will be inserted.
- Start the drill at a low speed to prevent slipping and ensure accuracy.
- Gradually increase the speed as the bit begins to cut into the material.
Step 5: Create the Countersink
- Drill to the desired depth, ensuring the countersink is deep enough for the screw head to sit flush or below the surface.
- Periodically check the depth to avoid over-drilling.
Step 6: Finish
- Once the desired depth is achieved, stop the drill.
- Remove the bit from the hole carefully.
- Inspect the countersink to ensure it meets your requirements.
Conclusion
The AM TECH 3PC Countersink Bit Set is a valuable tool for ensuring screws sit properly in your projects. By following these steps, you can achieve professional results safely and efficiently.
2 reviews for AM TECH Set of 3 Countersink Drill Bits
Loading...
Vendor Information
- Store Name: Good Office Supplies
- Vendor: Good Office Supplies
- No ratings found yet!
Product Location
32 The Broadway, Ealing, Greenford, UB6 9PT, United Kingdom-
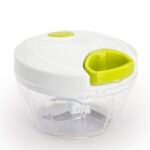
Healthy Eating Manual Hand-Pull Mini Chopper
£3.95 Add to basket -
PASABACHE LUNA 250ML TUMBLERS, PACK OF 6
£4.39 Add to basket -
17 x 4cm High-Quality Brushed Metallic Self-Adhesive ‘Private Property’ Sign
£0.61 Add to basket -
Customizable Message Cocktail Sticks with Cupcake and Sandwich Flags – Set of 50
£0.72 Add to basket -
Mini Faux Succulent in Square Transparent Planter
£0.94 Add to basket -
Green Garden Sacks Roll10 by Royal Market
£1.38 Add to basket




Dameer (verified owner) –
Excellent service! I’ve never had an issue with any of my orders. The products are always high quality, and the wholesaler’s team is always helpful.
Uzma (verified owner) –
I always look forward to shopping with this wholesaler. The products are fantastic, and I know I’ll receive them quickly every time.