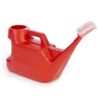
7L Red Watering Can for Weed Control
How to Use the Weed Control Watering Can 7L
Introduction
This guide will help you effectively use the 7L Weed Control Watering Can with a spray fan head. Follow these steps to ensure efficient weed control in your garden.
Materials Needed
- Weed Control Watering Can 7L
- Weed control solution or herbicide
- Water
- Protective gloves and eyewear (optional but recommended)
Instructions
Step 1: Prepare the Weed Control Solution
- Read the instructions on your chosen weed control solution or herbicide.
- Mix the solution with water according to the product’s guidelines.
Step 2: Fill the Watering Can
- Ensure the cap is securely fastened on the watering can.
- Open the fill cap located at the top of the watering can.
- Carefully pour the prepared weed control solution into the watering can until it reaches the 7-liter capacity mark.
- Securely close the fill cap to prevent spills.
Step 3: Apply the Weed Control Solution
- Put on protective gloves and eyewear if desired.
- Hold the watering can by the handle and position the spray fan head towards the targeted weed area.
- Gently tilt the watering can to start spraying the solution evenly over the weeds.
- Ensure thorough coverage for maximum effectiveness.
Step 4: Clean the Watering Can
- Once you have finished applying the solution, empty any remaining contents from the watering can.
- Rinse the inside of the can thoroughly with clean water to remove any residue.
- Allow the watering can to dry completely before storing.
Safety Tips
- Always follow the instructions on your weed control solution or herbicide.
- Avoid contact with skin and eyes; wear protective gear if necessary.
- Store the watering can in a cool, dry place when not in use.
Conclusion
By following these steps, you’ll be able to effectively use the Weed Control Watering Can 7L to manage weeds in your garden. Remember to handle all chemicals with care and follow the safety tips provided.
Loading...






Reviews
There are no reviews yet.