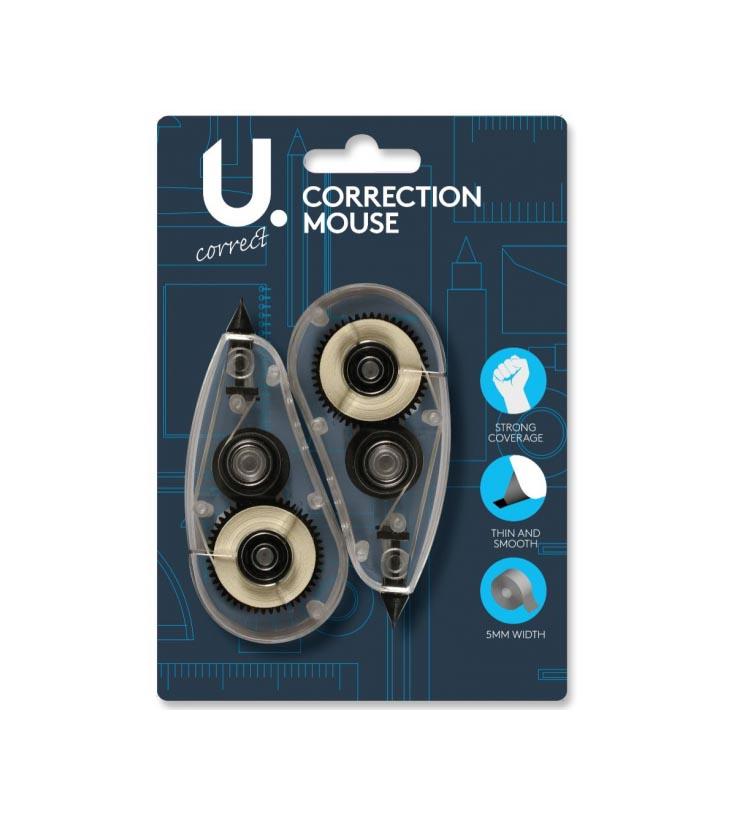
**2 Pack**: The product is sold in a set of two
£0.76
- Product includes a pack of 2 correction mice
- Designed for strong coverage on various surfaces
- Provides a thin and smooth application
- Each mouse has a width of 5mm
- The correction tape is white
- Colors and designs may vary from the photos
- Sizes are approximate and subject to availability
- Prices are based on one unit unless otherwise stated
Last updated on October 8, 2025 10:25 am Details
Report Abuse
Description
How to Use the Correction Mouse
Step 1: Prepare the Surface
- Ensure the surface you want to correct is clean and dry.
- Remove any debris or dust that might affect the adherence of the correction tape.
Step 2: Hold the Correction Mouse
- Grip the correction mouse comfortably with your hand.
- Position your index finger on the top button or lever of the mouse for better control.
Step 3: Align the Tape
- Place the tip of the correction mouse at the beginning of the text or area you wish to cover.
- Ensure the tape is aligned with the text for precise coverage.
Step 4: Apply the Tape
- Press down gently on the mouse as you pull it across the text or area.
- Move the mouse in a straight line to apply an even layer of correction tape.
- Release pressure at the end of the area you are correcting.
Step 5: Check the Coverage
- Inspect the corrected area to ensure full coverage.
- If necessary, apply another layer of tape by repeating the previous steps.
Step 6: Store Properly
- Store the correction mouse in a cool, dry place.
- Ensure the tape is not exposed to direct sunlight to maintain its quality.
Shipping Countries: United Kingdom (UK)
Ready to ship in 3-5 business days
Shipping Policy
Orders over £50 FREE Shipping
International orders, please contact us by email before lacing orders.
Refund Policy
Refund policy
Non-faulty items must be returned within 14 Days. We reserve the right to charge a restocking fee of 50% if we agree to unused & unopened returns. All items & packaging will be inspected, we do not pay for or contribute towards postage or shipping fees, you must used tracked services as we do not accept untracked.
Returns on smoking and e-cigarette items are not accepted.
We operate a 5% margin for broken or faulty goods.
The risk of damage to or loss of the goods passes to you at the time of delivery or the time we attempt delivery. This is when the goods are collected if you fail to take delivery at the agreed time.
Other than implied warranties and guarantees under the law, business-to-business sales are not covered by warranties or guarantees.
Orders are despatched by pallet or by box for smaller deliveries. In the event that the pallet or wrapping shows any signs of damage, please notify us immediately by emailing help@m8w.co.uk and noting it on the delivery manifest. If the order is below £750 + VAT and not sent on a pallet, we do not take any responsibility for damages or issues with any products including liquids, glass etc.
Once the goods leave our warehouse with our chosen carrier, it is your responsibility to inquire if you require insurance. The goods are not insured by default, so it is important to discuss this with us prior to placing your order so that we can get a quote for you for the premium to cover the value of the goods. If there is any evidence of damage during transit, the delivery note should be noted and reported immediately to customer services. Never accept delivery if there is evidence of significant damage.
Our customer service team must be notified within 72 hours of any shortages or damages above 5%. In the event that this timeframe does not apply, all claims will be deemed waived and completely barred.
We charge an administration/picking/packing fee of 25% of the order value plus any delivery charges incurred for cancelled or refunded orders. Refunds are not available for any deposits paid.
The cost of returning damaged or faulty items to us for inspection must be borne by you. Returning items is your responsibility, including handling and shipping.
Once we receive damaged returned goods, we will inspect them and determine whether or not liability can be accepted. We will notify you as soon as the outcome is known.
There will be no liability beyond the value of the goods.
Opened and non-originally packaged goods will not be accepted for return.
Please also refer to our Terms & Conditions page for further information and policies.
5 reviews for **2 Pack**: The product is sold in a set of two
Loading...
Vendor Information
- Store Name: TK Wholesaler
- Vendor: TK Wholesaler
- No ratings found yet!
Product Location
UB8 9PZ, Uxbridge, Greater London, England, United Kingdom-

Product
£60.50 Add to basket -
The Metal Garden Rake with 16 Teeth, model SK28655, is a gardening tool designed to help with tasks like leveling soil, removing debris, and spreading mulch or gravel. It…
£8.25 Add to basket -
It looks like you’re referring to a product description for traditional yellow dusters. These are household cleaning cloths that typically measure 11 x 13 inches and come in a…
£1.09 Add to basket -
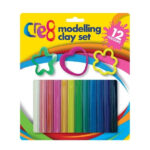
This type of product is popular in educational settings, art projects, and for general play to help develop fine motor skills and creativity
£0.88 Add to basket -
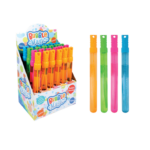
The Bubble Wand Sword is a toy that measures 36 cm in length and holds 110 ml of bubble solution. It comes in assorted colors, adding variety and excitement for children. The…
£0.83 Add to basket -
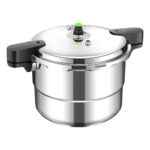
The High Wall Non-Stick Flat Base Wok Frying Pan with a 32 cm diameter is a versatile kitchen tool, ideal for stir-frying, sautéing, and deep-frying thanks to its high walls…
£10.95 Add to basket


Elizabeth (verified owner) –
I’m consistently impressed with the quality of the products from this wholesaler. They’re reliable, and the prices are very competitive.
Walter (verified owner) –
The wholesaler has been a reliable source for all my business needs. Great products at great prices, and delivery is always on time!
Zafar (verified owner) –
I’ve found my go-to wholesaler! The products are amazing, and they always ship quickly. Excellent customer service too!
Udaina (verified owner) –
Absolutely fantastic experience! I’ve been ordering from this wholesaler for a while now, and they consistently deliver top-quality products.”
Majidah (verified owner) –
I’ve ordered several times, and every time the experience has been smooth and satisfying. The product quality is always consistent, and delivery is on time.