17x4cm Brushed Metallic Self-Adhesive ‘No Smoking’ Sign
£0.61
Last updated on June 6, 2025 1:08 am Details
Report Abuse
Description
How to Use the High Brushed Metallic Self Adhesive “No Smoking” Sign
Step 1: Choose the Location
- Select a flat and clean surface where the sign will be easily visible.
- Consider placing it near entrances, exits, or designated non-smoking areas.
Step 2: Clean the Surface
- Wipe the surface with a damp cloth to remove any dust, dirt, or grease.
- Ensure the area is dry before applying the sign.
Step 3: Prepare the Sign
- Carefully remove the protective backing from the adhesive side of the sign.
- Avoid touching the adhesive surface to maintain its stickiness.
Step 4: Apply the Sign
- Align the sign in the desired position on the surface.
- Press firmly from the center outwards to ensure full adhesion and to remove any air bubbles.
Step 5: Inspect the Installation
- Check that the sign is securely attached and fully visible.
- Make adjustments if necessary by gently repositioning the sign.
4 reviews for 17x4cm Brushed Metallic Self-Adhesive ‘No Smoking’ Sign
Loading...
Vendor Information
- Store Name: Good Office Supplies
- Vendor: Good Office Supplies
- No ratings found yet!
Product Location
32 The Broadway, Ealing, Greenford, UB6 9PT, United Kingdom-
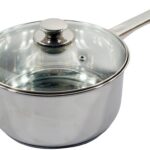
PRIMA 16CM / 1.3L STAINLESS STEEL SAUCEPAN WITH LID
£5.38 Add to basket -
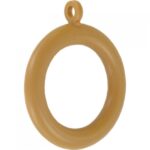
FAST PAK VALUE 6852 Natural 56mm Curtain Pole Rings, Pack of 6
£0.65 Read more -
Doff Green Fingers Lawn Seed with Bio Coat, 1kg for 40 sqm Coverage
£7.25 Add to basket -
MARKSMAN White PVC Electrical Insulation Tape, 19mm x 20m
£0.50 Add to basket -
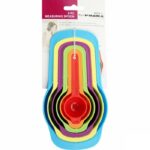
Set of 6 PRIMA Measuring Spoons
£1.42 Add to basket -
APOLLO WOODEN BATHROOM TISSUE DISPENSER
£3.25 Add to basket




Aariz (verified owner) –
This wholesaler has been my go-to for all my supplies. Great prices, excellent quality, and fast shipping. Highly recommend!
Ihsan (verified owner) –
Wonderful products, great service, and timely delivery. I’ll definitely continue shopping here for my business needs.
Dameer (verified owner) –
Great wholesaler to work with. The products are high-quality, and their service is always professional and prompt.
Abdul Hafeez (verified owner) –
Perfect purchase experience. The product arrived exactly as expected, and I can’t say enough about the excellent customer support.