Add products from the supplier dashboard
Add and manage products from the supplier dashboard
Adding products to your store is simple and intuitive on the Compare the Suppliers platform. Follow these steps to get started:
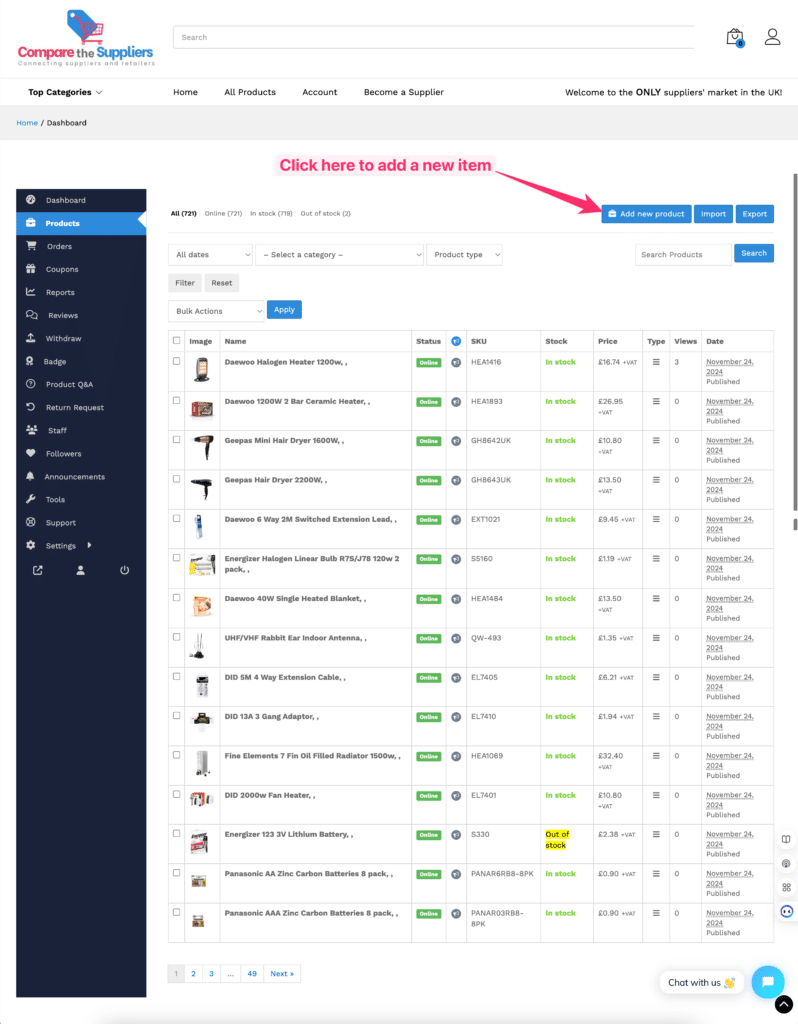
Step 1: Navigate to the Products Section
- Log in to your supplier account and access the Dashboard.
- In the menu on the left side of the dashboard, click on Products.
- Here, you’ll find a list of all your existing products, which you can manage or update as needed.
- To add a new product, click the “Add New” button at the top of the Products page.

Step 2: Fill Out Product Details
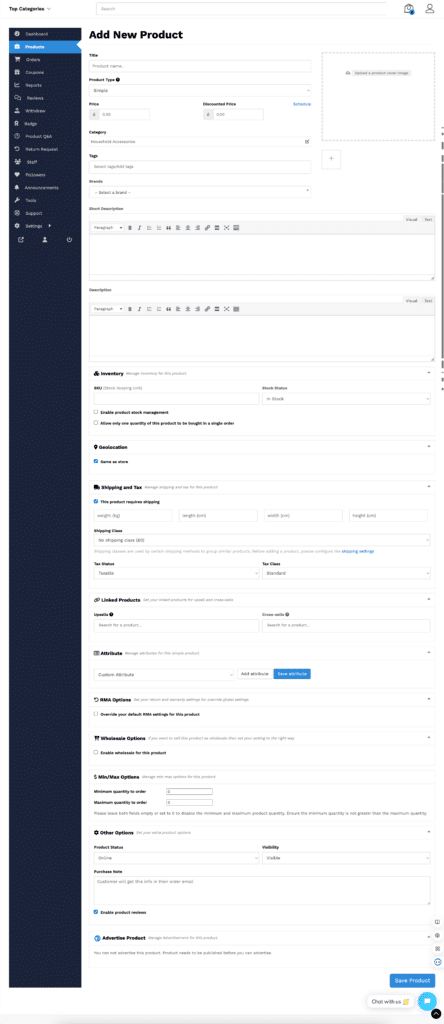
On the product creation page, you’ll see multiple sections to input information about your product:
Product Title
- Enter a clear and descriptive title for your product.
Price
- Set the price for your product. You can also add a sale price if applicable.
Category
- Choose the appropriate category to help customers find your product easily.
Tags
- Add relevant tags to improve product discoverability in searches.
Other Details
- You can fill in additional fields such as stock quantity, product images, descriptions, and attributes depending on your product type.

Step 3: Save Your Product
- Once you’ve filled out all the necessary details, click the Save button to add your product to your store.
- Your product will now appear in the Products section of your dashboard, ready to be viewed and purchased by customers.
🎉 That’s it! Your product is now live and available for customers to see. Repeat this process to add more products and expand your store offerings!
